
With CentOS reaching end of life, I had to migrate my GitLab installation to a new server. I chose AlmaLinux 9 (https://almalinux.org/) for this: it is also based on Red Hat, with the same package system, so I wouldn't be lost.
This procedure should work with every distribution supported by GitLab (https://docs.gitlab.com/install/package/#supported-platforms), give or take a few adjustments to some commands (apt install instead of dnf install if you are on a Debian-based system, for example).
I used the following documentation as a reference: https://docs.gitlab.com/administration/backup_restore/restore_gitlab/
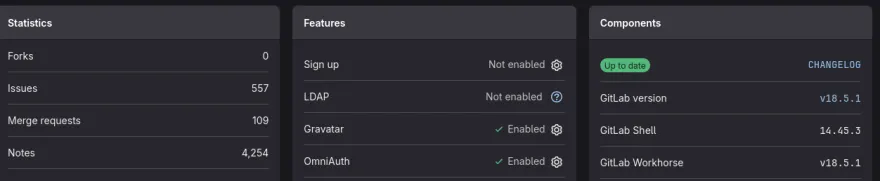
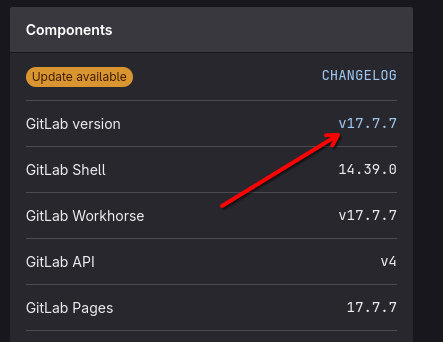
Note that you absolutely must install, on the new server, the exact same GitLab version as on the old server. To find it, go to the admin panel, where the information is shown in the bottom right corner:
So you will need SSH access to your old server (below, its IP is replaced by OLD), and SSH access to the new server (below, its IP is replaced by NEW). In my case, the new server is an instance with a fresh AlmaLinux 9 install, and nothing else.
Installing GitLab on the new server
Connect over SSH to your new server (ssh root@NEW)
# Update and install the required packages
dnf update
dnf install -y curl vim

# Install the GitLab Community Edition repositories
curl "https://packages.gitlab.com/install/repositories/gitlab/gitlab-ce/script.rpm.sh" | sudo bash

# Find the package version matching the version installed on the old server

dnf search --showduplicates gitlab-ce

# in my case: gitlab-ce-17.7.7-ce.0.el9

# Install GitLab, specifying the instance URL
sudo EXTERNAL_URL="https://gitlab.exemple.com" dnf install gitlab-ce-17.7.7-ce.0.el9
Backing up and transferring the existing instance
Connect over SSH to your old server (ssh root@OLD)
# If you don't have an SSH key pair on your old server, create one:
ssh-keygen -t ed25519 -C "root@old"

# add the old server's public key to the new one, so we can connect without a password
ssh-copy-id root@NEW


# Before running the backup, disable access to the instance
sudo gitlab-ctl stop sidekiq
sudo gitlab-ctl stop puma

# Run a backup of the GitLab instance
gitlab-backup create BACKUP=dump_full GZIP_RSYNCABLE=yes

# Transfer the secrets (file not included in the backup)
rsync /etc/gitlab/gitlab-secrets.json -e ssh root@NEW:/etc/gitlab/

# Transfer the configuration (file not included in the backup)
rsync /etc/gitlab/gitlab.rb -e ssh root@NEW:/etc/gitlab/

# Transfer the backups
rsync -avh --stats /var/opt/gitlab/backups/* -e ssh root@NEW:/var/opt/gitlab/backups/
Restoring the backup on the new server
Connected over SSH to your new server again (ssh root@NEW)
# Stop the services connected to the database
sudo gitlab-ctl stop puma
sudo gitlab-ctl stop sidekiq

# check the name of the backup to restore:
ls -alh /var/opt/gitlab/backups/

# in my case the archive is named dump_full
# the "_gitlab_backup.tar" part of the file name is left out
# -rw-------.  1 git  git   22G Oct 24 08:48 dump_full_gitlab_backup.tar

# run the restore (long process)
sudo gitlab-backup restore BACKUP=dump_full

# reconfigure GitLab from the restored data
sudo gitlab-ctl reconfigure

# restart all services
sudo gitlab-ctl start

# Check that everything is fine
sudo gitlab-rake gitlab:check SANITIZE=true

# Check the integrity of the encrypted data using the secrets file we transferred
sudo gitlab-rake gitlab:doctor:secrets

# Check the overall integrity of all restored data
sudo gitlab-rake gitlab:artifacts:check
sudo gitlab-rake gitlab:lfs:check
sudo gitlab-rake gitlab:uploads:check

# Run a database analysis from the console
sudo gitlab-rails dbconsole --database main

SET STATEMENT_TIMEOUT=0 ; ANALYZE VERBOSE;
Finishing the migration
If everything is fine, you can now either change the DNS configuration to point your GitLab server's domain name to the new server, or assign the old server's IP to the new one (which is what I did, since my servers are virtualized).
Once everything is OK, you can run the GitLab updates on the new server to get the latest releases:
sudo dnf updateIn my case, I had to go through intermediate upgrades, 17.8.x, 17.11.x and then 18.2.x, before running the final update:
To find the latest release of an intermediate version:
dnf search --showduplicates gitlab-ce | grep "17.8"
Last metadata expiration check: 0:03:51 ago on Fri 24 Oct 2025 01:06:17 PM UTC.
gitlab-ce-17.8.0-ce.0.el9.x86_64 : GitLab Community Edition (including NGINX, Postgres, Redis)
gitlab-ce-17.8.1-ce.0.el9.x86_64 : GitLab Community Edition (including NGINX, Postgres, Redis)
gitlab-ce-17.8.2-ce.0.el9.x86_64 : GitLab Community Edition (including NGINX, Postgres, Redis)
gitlab-ce-17.8.4-ce.0.el9.x86_64 : GitLab Community Edition (including NGINX, Postgres, Redis)
gitlab-ce-17.8.5-ce.0.el9.x86_64 : GitLab Community Edition (including NGINX, Postgres, Redis)
gitlab-ce-17.8.6-ce.0.el9.x86_64 : GitLab Community Edition (including NGINX, Postgres, Redis)
gitlab-ce-17.8.7-ce.0.el9.x86_64 : GitLab Community Edition (including NGINX, Postgres, Redis)
So I ran, one after the other:
sudo dnf install gitlab-ce-17.8.7-ce.0.el9.x86_64

sudo dnf install gitlab-ce-17.11.7-ce.0.el9.x86_64

sudo dnf install gitlab-ce-18.2.8-ce.0.el9.x86_64
Finally, remember to reinstall GitLab Runner if you were using CI (https://docs.gitlab.com/runner/install/linux-repository/) and to set up backups of your instance again. Here is what I have in my crontab for 2 backups a day plus a full backup:
30 18 * * * gitlab-backup create BACKUP=dump_night GZIP_RSYNCABLE=yes SKIP=registry,artifacts
30 11 * * * gitlab-backup create BACKUP=dump_day GZIP_RSYNCABLE=yes SKIP=registry,artifacts
30 19 5 * * gitlab-backup create BACKUP=dump_full GZIP_RSYNCABLE=yes 
Written by Kevin Gautreau — freelance PHP/Drupal developer & trainer in Auvergne, France. get in touch
Comments (0)